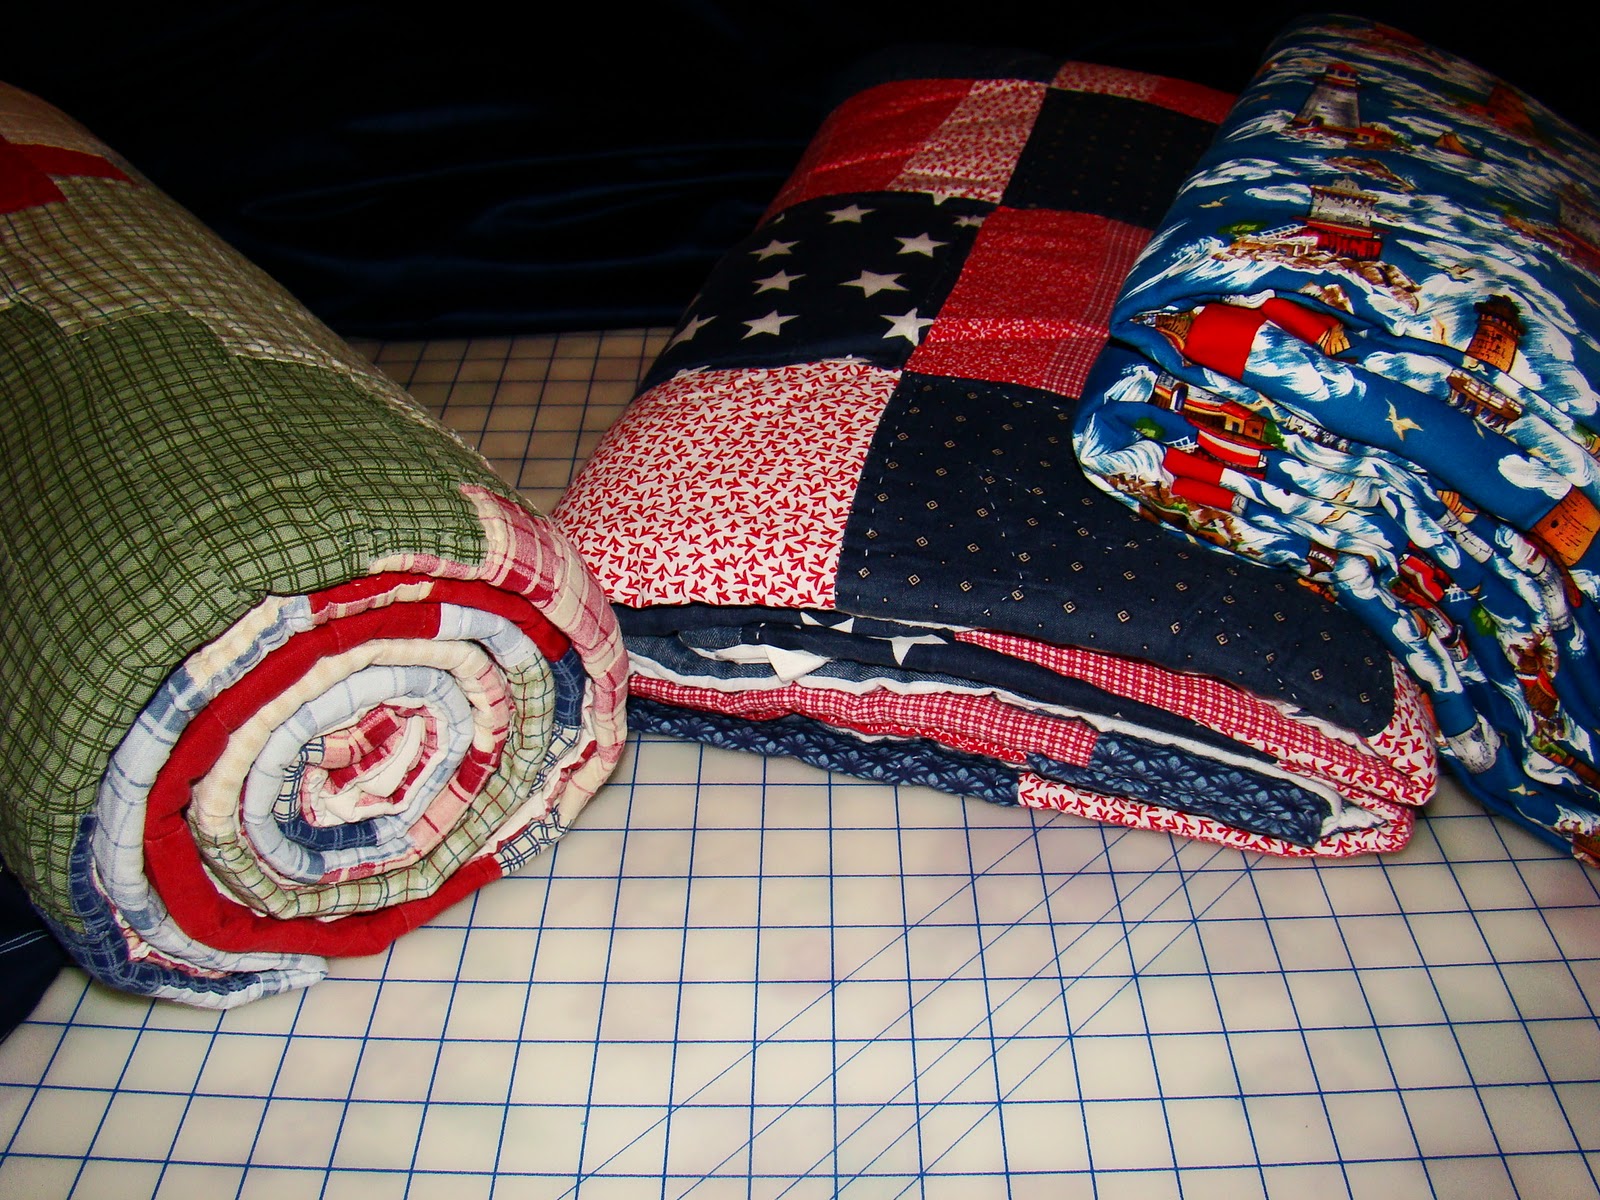
We had blankets strewn all over the boat down below. I got tired of not having a blanket cabinet or a place I could put them. Sometimes, I would fold them up and stack them, but that stack would need to be moved from v-berth to aft to dinette and back again. The stack would then end up not folded or messed up. One day, one of my children stuffed one of the blankets under their head for a pillow and it made me think....why not make pillow covers for them?? I love it, they look like decorative throw pillows and it makes the boat look cleaner and neater!!

If you have some basic sewing skills, you can make some blanket covers of your own. Here's how I made one of my covers:
Items Needed
Fabric of your choice- enough for both sides of the pillow (plus enough to cover cording for optional piping)
Nylon/Plastic Sports Zipper- (metal zippers seem to corrode more easily)
Matching Thread
Cording (optional for piping)
Measuring Tape
Cording (optional for piping)
Measuring Tape
Scissors
Pins
Scraps of old T-shirt material
Sharpie
Sewing Machine
Instructions
All seam allowances are 1/2 inch unless otherwise indicated.
Step 1
Choose the blanket you wish to cover.

Step 2
Fold the blanket into desired shape. I folded mine almost square.

Step 3
Record how it was folded, leaving a 1/2 inch margin at the top, on T-shirt fabric with Sharpie (This helps any users of the blanket know how to fold it perfectly and fit it back inside the case). Set the tag aside for attachment later.

Step 4
Measure all the way around the blanket lengthwise. My measurement was 37 inches.

Step 5
Measure all the way around the blanket widthwise. My measurement was 31 inches.
Step 6
Divide those amounts in half to get side sizes. I got 15 1/2" wide by 18 1/2" long.
Step 7
I then added 1" for seam allowances to one side of the pillow. My finished measurements were then 16 1/2" wide by 19 1/2" long. I called this "Side A."
Step 8
I then added 1" to the width and 2" to the length for seam allowances on the other side of the pillow. My finished measurements were then 16 1/2" wide by 20 1/2" long. I called this "Side B."
Step 9
I cut one piece of fabric 16 1/2" wide by 19 1/2" long for "Side A"
and
I cut another piece of fabric 16 1/2" wide by 20 1/2" long for "Side B"
Optional Piping
Measure around outside edges of side A to determine length of piping needed. I made mine a little longer: 76" total.
Make the piping (I have not included instructions for this).

Step 10
Finish the edges of both "Side A & B" by serging or zigzag stitching all the way around each piece individually.
Optional Piping
On "Side A" of pillow, sew piping around all edges ending with piping together and finishing it neatly.

Step 11
Attach one side of the zipper to the long edge of "Side A", centering it evenly and having edge of zipper flush with the edge of the fabric.
Step 12
Press under 1 1/2" on long edge of "Side B".

Step 13
Zip remaining side of zipper to the one already sewn to "Side A". Mark where the zipper needs to be sewn on "Side B". Unzip and stitch "Side B" zipper in place.

Note:
Zipper should be completely hidden by the pressed-under edge of "Side B". The photo above shows the zipper when the flap is moved aside.

And this photo shows the flap closed and hiding the zipper.

Step 14
Zigzag stitch the folding instructions onto "Side B" below the zipper, and ONLY to the flap, NOT THROUGH BOTH LAYERS.
Step 15
Zip "Side A" to "Side B" and turn inside-out, with right sides together. Pin all edges, matching corners and edges. Stitch in place.
Step 16
Unzip and turn cover right side out.

Step 17
Zip cover closed and stitch diagonally over corners of cover, through all layers, on both ends of zipper, to anchor tab over zipper and hold ends of zipper in place.

Step 18
Press the cover with an iron.

Step 19
Unzip the cover and try it on over the folded blanket!!
2 comments:
This is such talent Mom- what a great project! I love that these are both decorative and conviently can be used as storage! Beautiful. Do you plan to include instructions on the round pillow?
I only included instructions for the square one because it was really easy to make. The round one is a little more difficult. However, I would be happy to write out the steps for someone should they be interested. :)
Post a Comment